Black Garlic Mold: Top Reasons and How to Prevent It
Black garlic typically molds due to improper conditions during production or storage. The main reasons include:
1. Imperfect Production Process
- Insufficient fermentation: Black garlic is made by fermenting garlic in a high-temperature, high-humidity environment for an extended period. If fermentation is incomplete or temperature/humidity control is inadequate (e.g., insufficient temperature or excessive humidity), excess moisture may remain inside the garlic, promoting mold growth.
- Inadequate sterilization: If the garlic surface or containers are not properly sanitized before fermentation (e.g., uncleaned garlic or contaminated containers), bacteria may multiply during fermentation.
2. Improper Storage Conditions
- Excessive humidity: Black garlic should be stored in a dry environment. Exposure to humid air or poor sealing (e.g., storing in a refrigerator) can allow moisture to seep in, leading to mold.
- Temperature fluctuations: Frequent temperature changes can cause condensation, increasing humidity. A cool, dry place at room temperature is better than refrigeration.
- Poor sealing: Exposure to air introduces mold spores, especially if opened packaging is not resealed properly.
3. Quality Issues with Raw Materials or Finished Product
- Damaged or moldy garlic: If the garlic used has bruises or mold spots before production, these may worsen during fermentation.
- Insufficient additives or preservatives: Some commercial black garlic may rely on preservatives. If these are absent or insufficient, mold risk increases.
4. Prolonged Storage
Even under ideal conditions, long-term storage may cause black garlic to gradually absorb moisture or degrade, eventually leading to mold.
How to Prevent Black Garlic from Molding?
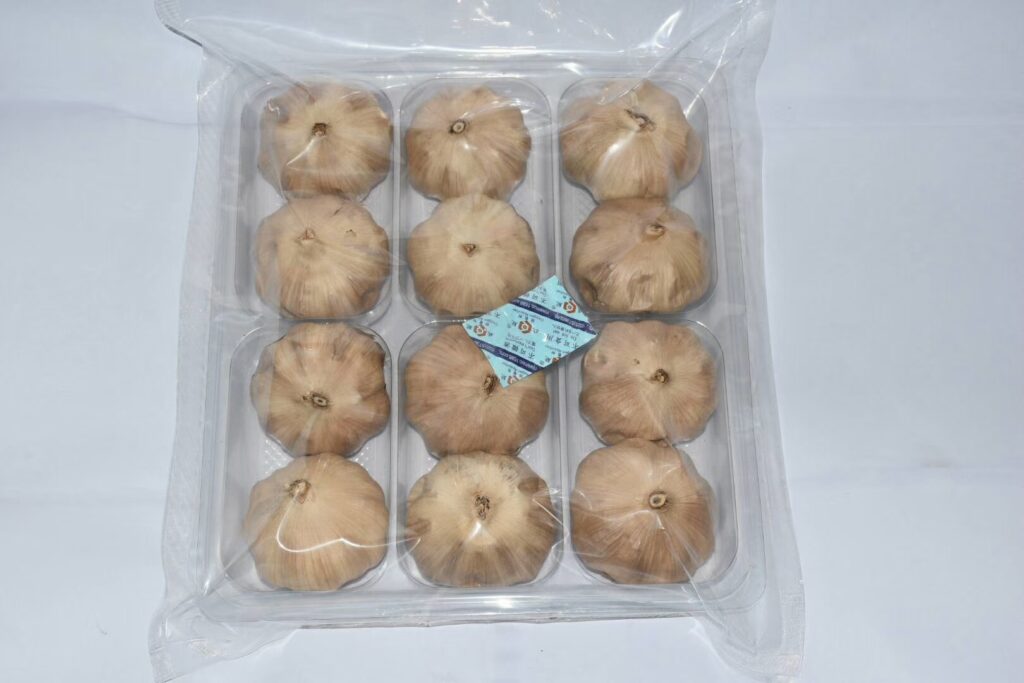
- When purchasing: Choose reputable brands, check if the packaging is vacuum-sealed, and ensure the garlic cloves are dry and not sticky.
- When storing: After opening, reseal tightly (e.g., using a ziplock bag with desiccant packs) and store in a cool, dry place. Avoid refrigeration.
- For homemade black garlic: Maintain consistent temperature and humidity in the fermentation chamber (typically 60–80°C with 60–80% humidity), and ensure thorough drying before storage.
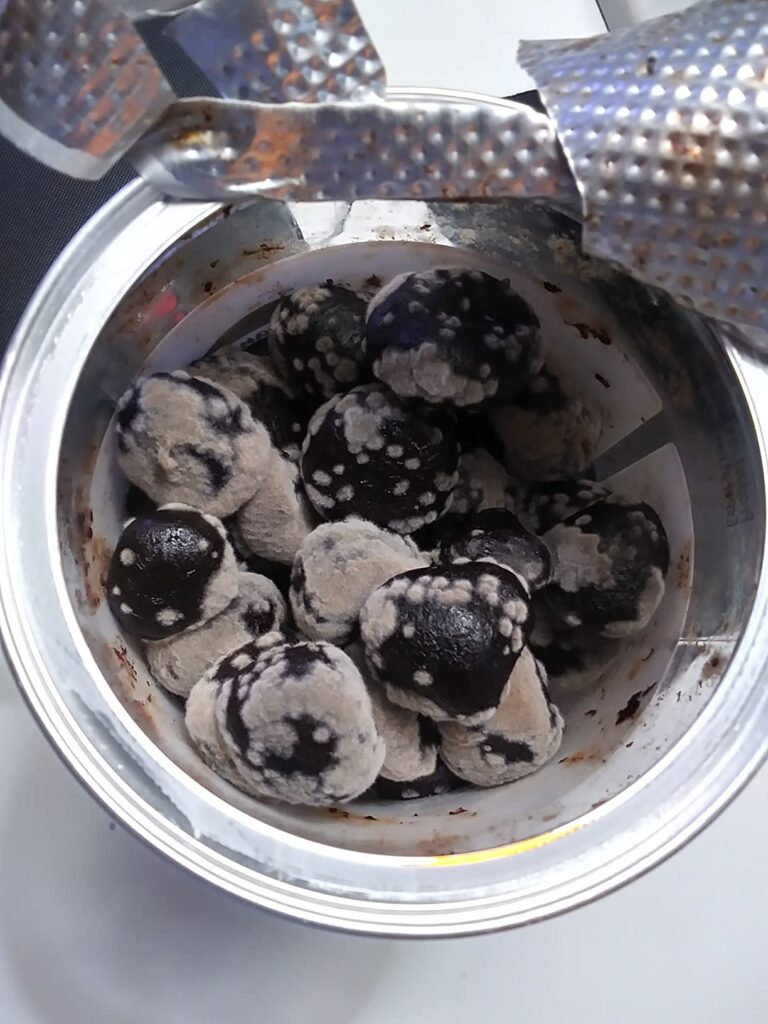
Can Moldy Black Garlic Be Salvaged?
- If mold is minimal (small white spots on the surface), the affected parts can be cut off, and the garlic should be thoroughly heated (e.g., baking) before immediate consumption.
- If mold covers large areas or appears green/black, it may produce toxins like aflatoxin and should be discarded.
Black Garlic Factory Mold Prevention Protocol
To ensure black garlic remains mold-free during production, factories must implement strict controls across raw material selection, production processes, environmental management, and packaging storage. Below are detailed prevention measures:
1. Raw Material Selection & Pre-treatment
(1) Strict Garlic Selection
- Use fresh, undamaged garlic bulbs free from mold; reject damp or sprouted bulbs.
- Test moisture content upon arrival (recommended ≤65%) to prevent fermentation issues.
(2) Thorough Cleaning & Sanitization
- After peeling, soak garlic in ozonated water or sodium hypochlorite solution (50-100ppm) for 3-5 minutes to reduce surface microbes.
- Regularly sanitize equipment (fermentation chambers, conveyors, packaging machines) with 75% alcohol or food-grade disinfectants.
2. Fermentation Process Optimization
(1) Precise Temperature & Humidity Control
- Temperature: Maintain 60-80°C (adjustable by phase) to ensure proper aging and inhibit microbial growth on black garlic.
- Humidity: Keep relative humidity at 60-80% (avoid >85% to prevent mold or <50% which hinders fermentation).
- Use automated monitoring systems for real-time data logging.
(2) Complete Fermentation of black garlic
- Allow 30-45 days fermentation (process-dependent) to eliminate residual moisture.
- Conduct batch testing for pH (target 3.5-4.5), moisture content (≤40%), and sensory evaluation.
(3) Microbial Competition
- Introduce beneficial cultures (e.g., lactic acid bacteria) early to outcompete molds.
- Use sealed fermentation chambers to minimize airborne contamination.
3. Drying & Post-Processing
(1) Low-Temperature Drying
- Dry at 40-50°C with air circulation for 12-24 hours to reduce moisture to ≤20%.
- Cool to room temperature before packaging to prevent condensation.
(2) UV/Ozone Treatment
- Apply brief UV exposure (1-2 minutes) or ozone treatment before packaging for surface sterilization.
4. Packaging & Storage Management
(1) Vacuum/Nitrogen Packaging
- Use high-barrier materials (e.g., aluminum composite films) with vacuum or nitrogen flushing (O₂ <1%).
- Ensure complete cooling before sealing to avoid moisture buildup.

(2) Storage Conditions
- Maintain warehouses at ≤25°C and ≤60% RH; implement “first-expired-first-out” inventory rotation.
(3) Natural Preservatives (Optional)
- Consider food-grade additives like natamycin or ε-polylysine for extended shelf life.
5. Quality Control & Testing
| Test | Parameter | Target |
|---|---|---|
| Microbial | Mold/Yeast Count | ≤100 CFU/g |
| Physical | Water Activity (Aw) | <0.65 |
| Environmental | Surface/Air Swabs | Pass sanitation standards |
6. Staff Training & Hygiene
- Require cleanroom attire (gloves, masks, coveralls) to minimize contamination.
- Train workers to identify and report abnormalities (odors, mold spots) immediately.
How to Make Black Garlic Noodles at Home